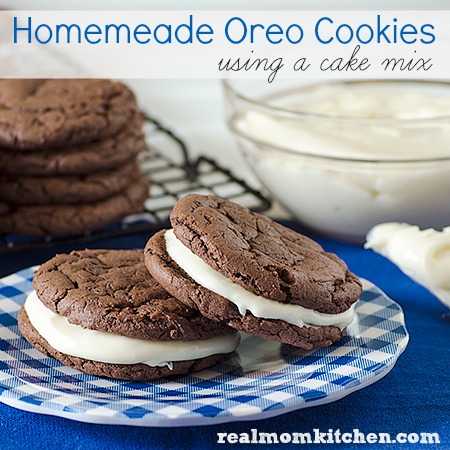
Heavenly Homemade Oreo Cookies Recipe
This post may contain affiliate links. Read our disclosure policy.
I had a recipe for homemade Oreo cookies from scratch. However, I couldn’t find it in my barrage of recipes. My husband loves these cookies, and I wanted to make them for him. I found this version at Not So Secret Family Recipes.
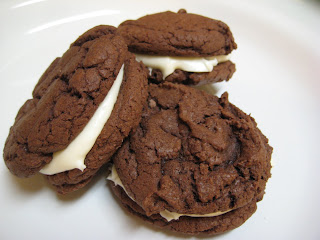
When I made this, I halved the cookie recipe but made the full frosting recipe. We love lots of frosting. When I pulled the cookies out at 8 minutes, they didn’t seem cooked enough. So, I ended up cooking them for 10 minutes. I think I actually overcooked them. They were still good, but next time, I’ll cook them for 9 minutes.

With the first tray, I just dropped the dough on the sheet with my cookie scoop, and the cookies came out too puffy. I wanted that flat Oreo look. So on the second tray, I flattened the dough a little before putting them in the oven. That worked great.
The other fun thing about this homemade version of the classic Oreo cookies is you can color the frosting to make them fun for the holidays. You can fill them with red and green colored frosting at Christmas, orange for Halloween, or even pink for Valentine’s Day. Or you can even use a yellow cake mix for the taste of golden Oreos!
Ingredients for Homemade Oreo Cookie Recipe
- DEVIL’S FOOD CAKE MIX
- OIL
- EGGS
- CREAM CHEESE
- BUTTER
- VANILLA
- POWDERED SUGAR
Instructions for Homemade Oreo Recipe
Make the Cookies: In a large bowl, whisk together the Devil’s Food cake mix, oil, and eggs together.
Shape the Cookies: Drop spoonfuls of the cookie dough onto ungreased baking sheets, or use a cookie scoop for evenly sized cookies. Gently flatten each cookie slightly with the back of a fork.
Bake the Cookies: Bake the cookies in a preheated oven at 350°F (175°C) for 8-9 minutes or until lightly golden brown. Let the cookies cool completely on the baking sheets on a cooling rack before frosting.
Make the Frosting AKA Cream Filling: In a medium bowl, beat the butter with an electric mixer on medium speed until smooth and creamy. Gradually add the powdered sugar, one cup at a time, beating well after each addition. Beat in the milk and vanilla extract until the frosting is smooth and spreadable.
Assemble the Sandwiches: Frost the bottom of one chocolate cookie with a generous amount of frosting. Top with another cookie to create a sandwich.
Frequently Asked Questions
Can I use a different type cake mix?
Yes, you can use any cake mix to make various flavors.
Can I make the cookies ahead of time?
Yes, you can make the cookies ahead of time and store them in an airtight container at room temperature for up to 5 days. You can also freeze the baked cookies for up to 3 months.
Can I add different flavors to the filling?
Absolutely! You can experiment with different flavors by adding extracts like peppermint extract, almond extract, or even a dash of espresso powder to the filling for a unique twist.
How do I store leftover filled cookies?
Store the filled cookies in an airtight container in the refrigerator for up to 3 days. For longer storage, freeze them and thaw at room temperature before serving.
For more recipes like this, try:
- Swig Sugar Cookies
- Crumbl Copycat Pumpkin Cake Cookies
- Levain Bakery Chocolate Chip Cookies
- Zesty Lemon Cookies

Homemade Oreo Cookies
Real Mom Kitchen
Equipment


Ingredients
Cookies
- 2 boxes devil's food cake mix
- ⅔ cup oil
- 4 eggs
Frosting
- 4 oz cream cheese softened
- 1 Tbsp butter softened
- 1 tsp vanilla
- 2 Cups powdered sugar
Instructions
- In a bowl, add the cookie ingredients and mix by hand.
- Drop spoonfuls on to a cookie sheet or use a cookie scoop. Then flatten slightly.
- Bake at 350° for 8-9 minutes. Allow cookies to cool.
- In another bowl, mix the frosting ingredients together with a mixer. The frosting will seem really thick but just keep mixing.
- Spread frosting over the bottom of a cookie and top with another creating a sandwich.
- Will make 48 cookies or 24 sandwiches.
Nutrition