
Easy Apple Tart
This post may contain affiliate links. Read our disclosure policy.
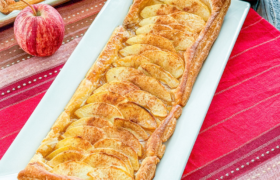
Fall is officially here, and this week I’m sharing recipes featuring one of my favorite fall flavors—apple! This Easy Apple Tart is proof that you don’t need a lot of ingredients or effort to make a delicious dessert. The original recipe came from The Pioneer Woman, and after several readers recommended it, I finally gave it a try. They were right! With flaky puff pastry and sweet, tender apples, it is incredibly simple to make and perfect for enjoying during apple season.
The first time I made it, I ended up with more apple filling than I needed for the two tarts. Rather than let those apples go to waste, I grabbed another sheet of puff pastry, sliced up one more apple, and made two additional tarts. We ended up with four apple tarts instead of two, which certainly wasn’t a problem when it came time to eat them!
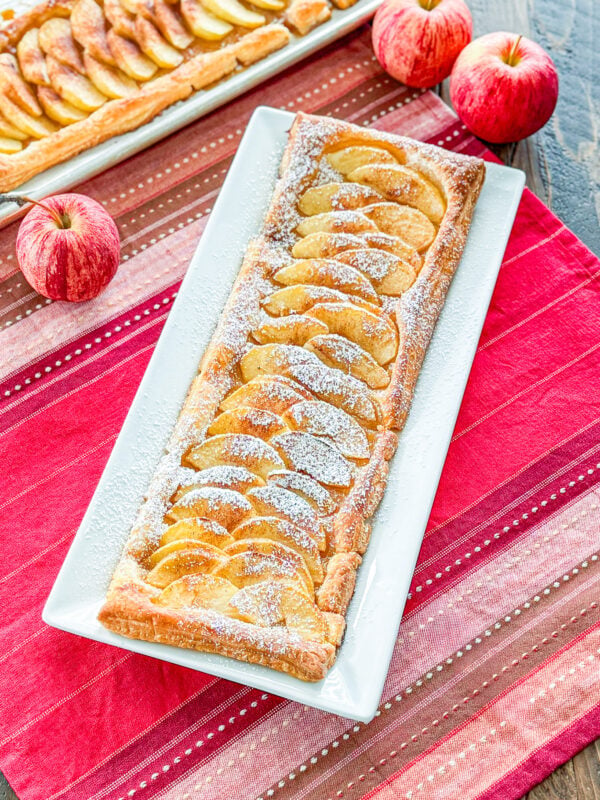
I’ve adjusted the recipe below so the filling amount works better for two tarts. You still get plenty of delicious apple flavor without making more dessert than you planned.
One thing I love about this simple but beautiful recipe is how versatile it is. Serve a warm slice with vanilla ice cream or frozen yogurt for an easy fall dessert, or drizzle it with a simple powdered sugar glaze for a special breakfast or brunch treat. I also have sprinkle a little cinnamon over the apples for extra fall flavor.
I left the skins on my apples the first time because I liked the color they added to the finished tarts. However, I found the skins a little too chewy, so I now prefer to peel the apples before making them. Other than that small change, this recipe is a keeper. It is a simple way to turn a few everyday ingredients into a beautiful apple dessert that looks like it took a lot more work than it actually is.
Ingredients for Easy Apple Tart
- PUFFED PASTRY – Puff pastry makes the base of these easy apple tarts. It bakes up into light, flaky, buttery layers that pair perfectly with the sweet apple filling. Store-bought frozen puff pastry keeps the recipe simple, but thaw it according to the package directions before using.
- APPLES (I HAVE USED GALA AND HONEY CRISP) – Apples are the star of this tart, adding natural sweetness and tender fruit flavor.I have used both Gala and Honeycrisp apples and both work beautifully. They add natural sweetness and hold their shape as they bake.I prefer peeling them for a softer texture, but you can leave the skins on if you like.
- BROWN SUGAR – Brown sugar sweetens the apples and adds a warm, caramel-like flavor. As the tart bakes, it combines with the apple juices to create a delicious filling.
- SALT – A little salt balances the sweetness of the apples and brown sugar while helping bring out the other flavors.
- LEMON JUICE – Lemon juice adds a touch of brightness that balances the sweet filling. It also helps keep the sliced apples from browning while you prepare the tarts.
- CINNAMON, OPTIONAL TO ADD FALL FLAVOR – Cinnamon adds warm spice and makes these apple tarts especially fitting for fall. It pairs beautifully with the apples and brown sugar, but you can leave it out if you prefer a more traditional apple flavor.
Instructions for Easy Apple Tart
Preheat the oven to 400°F. Lightly coat a baking sheet with nonstick cooking spray and set aside.
Core the apples and cut them in half, then slice them thinly. You can peel the apples or leave the skins on, but I prefer peeling them for a softer texture. If desired, toss the apple slices with a little lemon juice to help prevent browning.
Place the sliced apples in a bowl and add the brown sugar, a dash of salt, and cinnamon if using. Gently toss until the apples are evenly coated, then set them aside. As they sit, the sugar will begin to dissolve and draw out some of the apple juices.
Thaw the puff pastry according to the package directions, just until it is soft enough to unfold without cracking. Cut the pastry sheet in half and place both pieces on the prepared baking sheet.
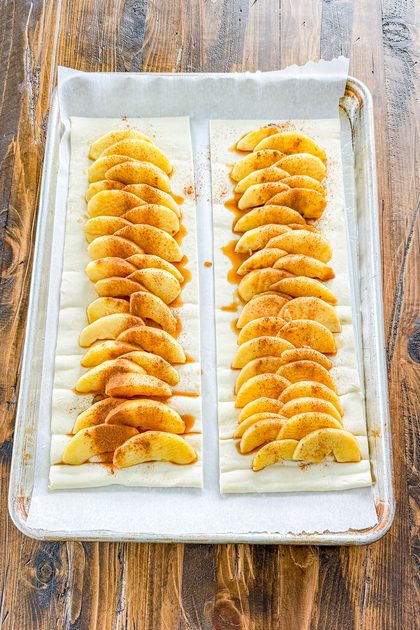
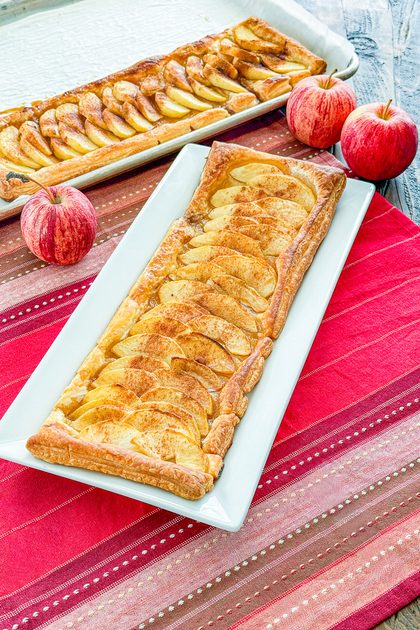
Arrange half the apple slices down the center of each pastry piece, overlapping them slightly like fallen dominoes. Leave a border of uncovered pastry around the edges so it can puff up as it bakes.
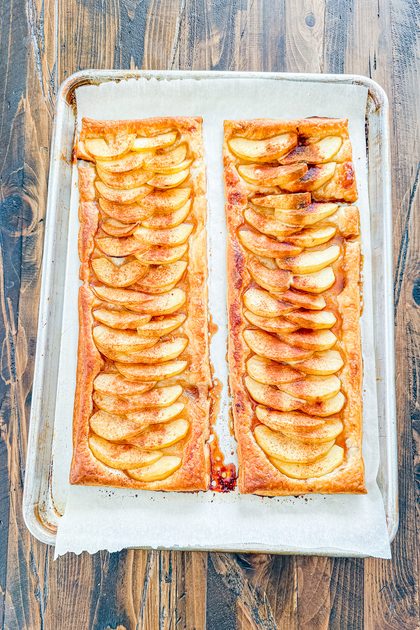
Bake for 18–20 minutes, or until the pastry puffs and turns golden brown and the apples are tender. Watch the tarts during the last few minutes so the edges don’t get too dark.
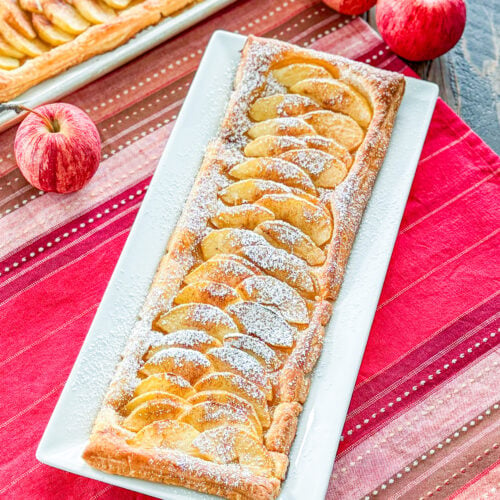
Remove the tarts from the oven and carefully transfer them off the baking sheet while they are still warm to prevent sticking. Dust with powdered sugar, slice, and serve warm.
These Easy Apple Tarts are especially delicious with a scoop of vanilla or cinnamon ice cream. You can also add a drizzle of caramel sauce or a dollop of sweetened whipped cream for an extra-special fall dessert.
Frequently Asked Questions
What kind of apples work best for this tart?
Gala apples work well because they are naturally sweet and hold their shape as they bake. Honeycrisp, Fuji, and Granny Smith are also good choices. Granny Smith apples will give the tart a slightly more tart flavor.
Should I peel the apples?
That is up to you. Leaving the skins on adds color, but I prefer peeling them because the skins can be a little chewy after baking.
Do I have to use lemon juice?
No. Lemon juice helps prevent the sliced apples from browning and adds a little brightness, but the tarts will still turn out delicious without it.
Can I add cinnamon to the filling?
Absolutely. A little cinnamon adds warm apple-pie flavor and makes these tarts especially nice for fall.
Why is my puff pastry not rising?
The pastry may have warmed up too much before baking, or the apples may have released too much liquid. Keep the pastry cool and avoid pouring excess juice from the apple mixture onto it.
Can I make these apple tarts ahead of time?
They are best served fresh, when the pastry is still crisp and flaky. You can slice and season the apples ahead of time, but I recommend assembling and baking the tarts shortly before serving.
How do I keep the bottom of the tart from getting soggy?
Avoid adding too much of the liquid that collects in the bottom of the apple bowl. Also, leave some uncovered pastry around the edges and bake until the bottom is cooked through.
Can I reheat leftover apple tart?
Yes. Reheat it in a 350°F oven for a few minutes until warmed through. The oven will help restore some of the pastry’s crispness.
What can I serve with Easy Apple Tart?
Vanilla ice cream, cinnamon ice cream, whipped cream, caramel sauce, or a simple powdered sugar glaze are all delicious options.
Tips and Tricks
- Keep the puff pastry cool. Thaw the pastry just until it is easy to unfold and work with. If it becomes too soft or sticky while you prepare the apples, put it back in the refrigerator briefly before baking.
- Slice the apples thinly and evenly. Thin slices cook quickly and become tender in the short baking time. Try to keep them close to the same thickness so you do not end up with some pieces that are still firm.
- Don’t add all the apple juices. The brown sugar will draw moisture out of the apples as they sit. Use the apple slices for the filling, but leave out excess liquid so it doesn’t soak into the pastry.
- Leave a border around the apples. Arrange the apple slices down the center of each pastry piece, leaving room around the edges. This allows the pastry to puff up and create a beautiful, flaky border.
- Transfer the tarts off the baking sheet while warm. The apple juices and brown sugar can become sticky as they cool. Carefully move the tarts to a serving platter or cooling rack shortly after baking so they do not stick to the pan.
For more recipes like this, try:
- Easy Chocolate Covered Caramel Apples
- Apple Turnovers with Caramel Icing
- Caramel Apple Gingerbread
- Apple Upside Down Cake
Easy Apple Tart
Real Mom Kitchen
Equipment


Ingredients
- 1 sheet puffed pastry
- 2 large apples I used gala
- ½ cup brown sugar
- salt
- lemon juice
- ground cinnamon you can use some too if you'd like
Instructions
- Core your apples in half, then slice them. You can leave the skin on or off. My preference is off. You can sprinkle your apple slices with a little lemon juice now if you'd like. I actually forgot to do this, and it was no problem. Mix the apple slices with the brown sugar and a dash of salt (and a little cinnamon if you'd like). Then let them sit.
- Get out your puff pastry and let it thaw. I believe the package says to give it 10 minutes. While it thaws, the sugar will have some time to soften, and the apples will get juicy.
- Next, cut your puff pastry sheet in half and place it on a sprayed baking sheet. Line half the apple slices down the center of the pastry, overlapping each other, like fallen dominoes.
- Bake at 400 degrees for 18 to 20 minutes, keeping an eye on the tart towards the end. You want it to be golden, but not too golden. Remove the tarts from the baking sheet, or they may stick. Sprinkle with powdered sugar, slice, and serve with a scoop of vanilla ice cream or frozen yogurt. Cinnamon ice cream would also be excellent. A drizzle of caramel and sweetened whipped cream would work too. Serves 8.
