Home Breads The Best Drop Biscuits

The Best Drop Biscuits

12 comments

This post may contain affiliate links.

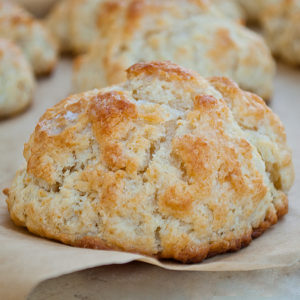
If rolling and cutting biscuits is something that intimidates you, then this recipe is for you!  The technique used in the best drop biscuits gets you a beautiful biscuit without having to cut in butter plus roll and cut out the biscuits.

The trick is adding melted butter to cold buttermilk.  This way you get nice little hunks of butter because the butter hardens into small pieces in the cold buttermilk. Genius huh?  Plus the dough is soft enough to just scoop and drop on the baking sheet.  No rolling and cutting here!

Now I have tried to use sour milk as a substitute for buttermilk often in recipes.  Since doing this, I have discovered that the sour milk works ok, but the real deal is always best!  I would recommend to use the real stuff in this recipe.  I don’t think you will get as wonderful of a result with sour milk.

You could always easily add some herbs to the dough of this biscuit for a change.  Next time I am going to try to mix in some cheese and brush the biscuits with garlic butter!  Also want to try them with some cheese and chives!

Print
clock clock iconcutlery cutlery iconflag flag iconfolder folder iconinstagram instagram iconpinterest pinterest iconfacebook facebook iconprint print iconsquares squares iconheart heart iconheart solid heart solid icon
The Best Drop Biscuits | realmomkitchen.com

The Best Drop Biscuits


Ingredients

Units Scale
  • 2 cups flour
  • 2 tsp baking powder
  • 1/2 tsp baking soda
  • 1 tsp sugar
  • 3/4 tsp salt
  • 1 cup buttermilk, chilled
  • 8 Tbsp butter, melted and slightly cooled
  • additional 2 Tbsp melted butter to brush on cooked biscuits, optional

Instructions

  1. Heat oven to 475 degrees F.
  2. In a large bowl, whisk together flour, baking powder, baking soda, sugar, and salt.
  3. In a 2-cup liquid measure, measure the buttermilk. Drizzle the 8 Tbsp butter into the buttermilk while stirring. The butter will turn into clumps in the cold buttermilk, this is what you want. This will give you the texture of a biscuit without having to cut the butter in.
  4. Stir the buttermilk mixture into the flour mixture with a rubber spatula just until the ingredients are incorporated and the mixture slightly pulls away from the edges of the bowl.
  5. Take a ice cream scoop or ¼-cup measure cup, and spray with cooking spray. You will want to do this each time before scooping the dough. Scoop out mounds of the dough and drop them onto a baking sheet lined with parchment paper, spacing about 1 ½ inches apart.
  6. Bake the biscuits until the tops are golden brown and crisp, 12 to 14 minutes. Remove from the oven and brush with additional 2 Tbsp melted butter. Serve warm. Makes 10-12 biscuits.
Recipe Card powered byTasty Recipes

Recipe adapted from Mel’s Kitchen Cafe.

Leave a Comment

Recipe rating 5 Stars 4 Stars 3 Stars 2 Stars 1 Star

* By using this form you agree with the storage and handling of your data by this website. Your email address will not be published.

12 comments

Buffalo Chicken Chili - Real Mom Kitchen : Real Mom Kitchen October 21, 2013 - 9:31 pm

[…] I love to pair chili with cornbread so I would suggest this 5 Star Cornbread or Honey Cornbread Muffins! If you aren’t into cornbread then you can also try these drop biscuits. […]

Reply
Buffalo Chicken Chili - Real Mom Kitchen : Real Mom Kitchen October 21, 2013 - 9:31 pm

[…] I love to pair chili with cornbread so I would suggest this 5 Star Cornbread or Honey Cornbread Muffins! If you aren’t into cornbread then you can also try these drop biscuits. […]

Reply
Heather November 18, 2012 - 4:19 am

I’ve made these before and loved them! I want to make them for Thanksgiving and am trying to do as much make-ahead food as possible. Can I prepare the batter ahead-of-time and just cook right before dinner? Alternatively, do you think I can cook the biscuits ahead and just reheat them prior to serving? If so, how do you recommend I reheat them?
Thanks much!
Heather

Reply
Menu Plan Monday ~ Jan 30, 2012 | Manda's Mommy Mayhem January 30, 2012 - 7:37 am

[…] Dinner – Beefy Vegetable Soup, Drop Biscuits […]

Reply
Menu Plan Monday ~ Jan 30, 2012 | Manda's Mommy Mayhem January 30, 2012 - 7:37 am

[…] Dinner – Beefy Vegetable Soup, Drop Biscuits […]

Reply
tracy November 10, 2011 - 6:32 am

real buttermilk is the way to go. this is the america’s test kitchen recipe, that cookbook rocks beyond belief.

Reply
tracy November 10, 2011 - 6:32 am

real buttermilk is the way to go. this is the america’s test kitchen recipe, that cookbook rocks beyond belief.

Reply
Stephanie G. October 14, 2011 - 11:28 am

Here’s another money saving tip: Making your own Cultured Buttermilk
Instructions are easily found on-line; here’s how I do it.
Ingredients:
1/2 cup Cultured Buttermilk (either Homemade Or Store Bought)
3 1/2 cups Milk (Skim, 1%, 2%, Whole Or Raw)
Preparation Instructions
Pour 1/2 cup buttermilk into a clean quart jar. Top off the jar with plain milk. Stir together until well mixed. Screw a lid on top of the jar. You can use a regular lid, or a plastic sprouting lid, like I do (so it can breathe). Place in a warm (but not hot) area out of direct sunlight. Let it sit there for 12 to 24 hours, until thickened. (If your house is too cool, it won’t culture. I had to put it in my oven with the light on one time.) Switch to a regular lid and refrigerate.
Some people compare the end result to runny yogurt, but the smell is totally different (like buttermilk). If you think it’s too thick, you can thin it down with a little milk when using it in a recipe.
If you re-culture this regularly, you can carry on re-culturing indefinitely.

Reply
Melanie October 14, 2011 - 7:00 am

Hi Laura – glad you loved these as much as we do. I agree that real buttermilk is best in this recipe!

Reply
Melanie October 14, 2011 - 7:00 am

Hi Laura – glad you loved these as much as we do. I agree that real buttermilk is best in this recipe!

Reply