Freezer Chicken Enchiladas
This post may contain affiliate links. Read our disclosure policy.
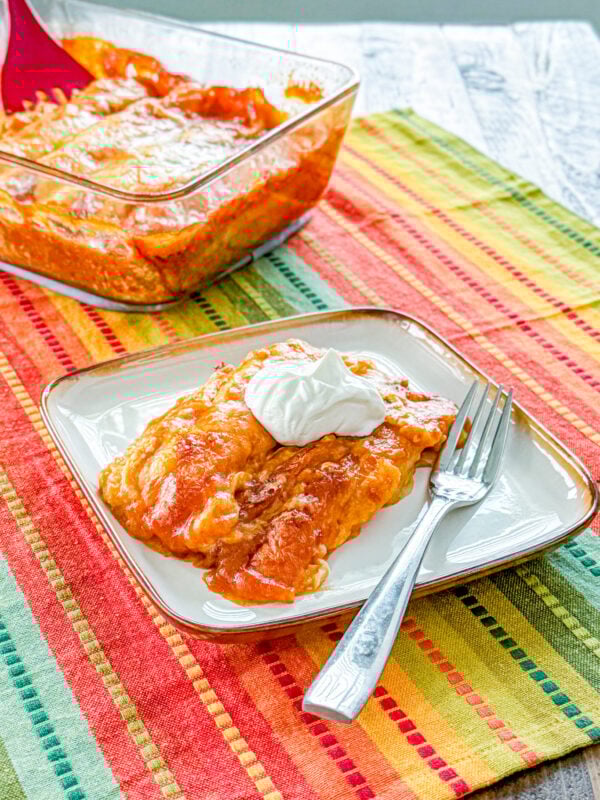
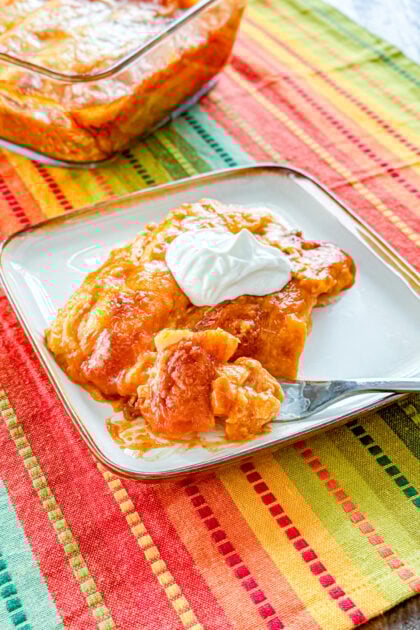
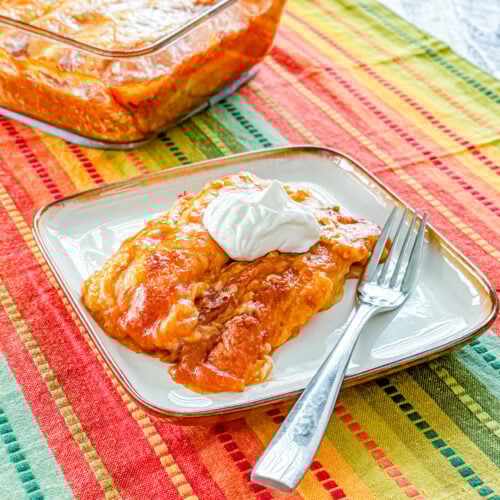
These freezer chicken enchiladas are wonderfully versatile—you can make them and enjoy them the very same day, or prep them ahead and stash them in the freezer for a future meal. The recipe freezes beautifully, whether you want to store the whole pan, divide it into two smaller batches, or portion it into single‑serve containers for easy grab‑and‑bake dinners. I often make a full batch, serve half for dinner that night, and freeze the rest so a homemade meal is always waiting for me on a busy day.
One of the best things about these enchiladas is how effortlessly they go from freezer to oven – no thawing required. Using rotisserie chicken keeps the prep incredibly simple, too. If you have one on hand, the only real cooking you’ll need to do is soften the onion in a little butter before mixing up the filling. After that, it’s just assemble, bake, and enjoy.
Instructions for Freezer Chicken Enchiladas
- BUTTER
- ONION
- GARLIC
- GREEN CHILES
- TACO SEASONING
- SOUR CREAM
- CHICKEN
- COLBY-JACK CHEESE
- FAJITAS-SIZED FLOUR TORTILLAS
- ENCHILADA SAUCE
- FRESH CILANTRO

Instructions for Freezer Chicken Enchiladas
Lightly coat the inside of your chosen baking dish with nonstick cooking spray. You can use one 9×13‑inch pan, two 8×8‑inch pans (six enchiladas per pan), or six smaller 5×7‑inch pans (two enchiladas each), depending on whether you want a full family‑size meal or freezer‑friendly individual portions.
In a medium skillet, melt the butter and add the diced onion. Cook over medium heat until the onion becomes soft and translucent. Stir in the garlic and cook for about 30 seconds, just until fragrant.
Add the diced green chiles and taco seasoning to the skillet, stirring well to combine. Let the mixture cook for another minute to bloom the spices and deepen the flavor.
Turn off the heat and stir in the sour cream until everything is smooth and well combined. Add the cooked chicken and 1 cup of shredded cheese, gently folding the mixture together to create the creamy enchilada filling.
Spread a thin layer of enchilada sauce across the bottom of your prepared pan(s) – just enough to lightly coat the surface and prevent sticking.
Spoon about ⅓ cup of the chicken mixture into the center of each flour tortilla. Roll the tortilla snugly to form an enchilada and place it seam‑side down in the pan. Continue filling and rolling until all the tortillas are arranged in the pan(s).
Pour the remaining enchilada sauce evenly over the top of the enchiladas, then sprinkle the rest of the shredded cheese across the surface.
If baking right away, preheat your oven to 375°F. Bake the enchiladas uncovered for 25–30 minutes, or until the cheese is melted, bubbly, and lightly golden. Let them cool for 3–5 minutes before serving, and garnish with fresh cilantro if you like.
To freeze, cover each pan tightly with aluminum foil, sealing all the edges well. Freeze until solid; the enchiladas will keep for up to 3 months.
When you’re ready to bake from frozen, place the covered pan in a 350°F oven and bake for 60–75 minutes. Remove the foil for the last 10–15 minutes to let the cheese melt, and the edges get beautifully bubbly and golden.
For individual portions, you can reheat them in the microwave by placing the enchilada on a microwave‑safe plate and covering it with a damp paper towel. Heat for 4–5 minutes, checking for even warming. You can also reheat in the air fryer—preheat to 350°F, place the enchilada in the basket, and cook for 10–15 minutes for crisp, golden edges.
Frequently Asked Questions
Can I use corn tortillas instead of flour?
You can, but corn tortillas tend to crack when rolled—especially after freezing. If you prefer corn, warm them first and consider dipping them lightly in enchilada sauce to keep them pliable.
Do I have to use rotisserie chicken?
No. Rotisserie chicken just makes prep fast and easy. You can use any cooked, shredded chicken—leftovers, meal‑prepped chicken, or even canned chicken in a pinch.
Can I make these enchiladas mild or spicy?
Absolutely. Use mild or hot enchilada sauce, depending on your preference. You can also choose mild or hot green chiles to adjust the heat level.
How long do the enchiladas last in the freezer?
They keep well for up to 3 months when tightly wrapped in foil. Be sure the edges are sealed to prevent freezer burn.
How do I know when they’re fully heated through?
The center should be hot and steamy, and the cheese should be melted and bubbly. If the middle still feels cool, give it an extra 5–10 minutes.
Can I swap the sour cream for Greek yogurt?
Yes – plain Greek yogurt works well and keeps the filling creamy while adding a little extra protein.
Can I add beans or veggies to the filling?
Definitely. Black beans, corn, sautéed peppers, or spinach all work great and stretch the filling even further.
What should I serve with these enchiladas?
Spanish rice, cilantro‑lime rice, refried beans, a simple green salad, or chips and salsa all pair perfectly.
For more recipes like this, try:
- Stacked Chicken Enchiladas
- Easy Chicken Enchilada Casserole
- Street Corn Chicken Enchiladas
- Easy Chicken Enchilada Soup
Freezer Chicken Enchiladas
Real Mom Kitchen
Equipment


Ingredients
- 1 Tbsp butter
- ¾ cup onion diced
- 1 Tbsp garlic minced
- 4 oz can diced mild green chiles
- 1 oz pkg taco seasoning
- ¾ cup sour cream
- 3 cups chicken cooked and shredded (about 2 lbs)
- 3 cups colby-jack cheese shredded and divided
- 12 flour tortillas (6 inch) fajita size
- 19 oz can red enchilada sauce (approximately 2 cups) divided
- fresh cilantro chopped (optional for garnish)
Instructions
- Lightly spray the inside of whatever pan you are using with nonstick cooking spray. Yoy can use one 9×13 inch pan, two 8×8 inch pans (6 enchiladas in each pan), or 6 pans around 5×7 inch in size(2 enchiladas in each pan).
- In a medium skillet, add the unsalted butter and onion. Cook over medium heat until the onion is translucent. Then add in the garlic and cook for abot 30 seconds.
- Add the diced green chiles and taco seasoning to the skillet, stirring to combine, and cook for an additional 1 minute.
- Turn off the heat to the skillet and stir in the sour cream until all the ingredients are combined. Then add in the cooked chicken along with 1 cup shredded cheese. Gently stir to combine.
- Add some enchilada sauce to the bottom of the pan/pans. You just need enough to coat the bottom.
- Add ⅓ cup chicken filling into the center of the flour tortilla and carefully roll the tortilla to form the shape of an enchilada. Place the filled tortilla into the prepared aluminum pan, seam side down. Repeat this process until all the tortillas are filled and placed in the pan/pans.
- Pour the remaining enchilada sauce evenly over the top of the enchiladas. Sprinkle the remaining shredded cheese evenly over the enchiladas.
To cook from freshly made
- If cooking immediately, preheat the oven to 375°F and bake uncovered for 25-30 minutes or until the cheese is bubbly and lightly golden. Remove from the oven and allow the enchiladas to cool for 3-5 minutes before garnishing with fresh chopped cilantro if desired and serving.
To freeze
- To freeze, cover the pan/pans with a piece of aluminum foil, tightly sealing the pans around all the edges. Place the pans to freeze solid the freezer. These will keep up to 3 months in the freezer.
Cooking from frozen
- When ready to bake, bake them at 350°F for about 60–75 minutes covered with foil. Uncover for the last 10–15 minutes so the cheese melts and the edges get a little bubbly and golden.
- For the individual portions, you can microwave them in a microwave-safe dish. Place a microwave-safe plate and cover it with a damp paper towel. Microwave for 4-5 minutes, checking for even heating. Alternatively, you can Air Fry individual portions too. Preheat to 350°F (175°C). Place enchiladas in the air fryer basket and air fry for 10-15 minutes for crispy, golden edges.
Nutrition
This recipe is adapted from Princess Pinky Girl.