How to make a Personal Charcuterie Box
This post may contain affiliate links. Read our disclosure policy.
Valentine’s Day is the perfect occasion to surprise your loved ones with a thoughtful and delicious gift. One idea I wanted to share with you is how to make a personal charcuterie box. These charming little boxes are not only a fantastic Valentine’s gift, but they are also perfect for any time you want to give a meaningful and delightful present to someone special.
You can customize each charcuterie board to suit the recipient’s taste with a mix of savory meats, cheeses, fresh fruits, and tasty accompaniments like nuts. Whether for Valentine’s Day, a birthday or simply as a gesture of appreciation, personal charcuterie boards are a versatile and elegant gift option that can bring joy to any occasion.
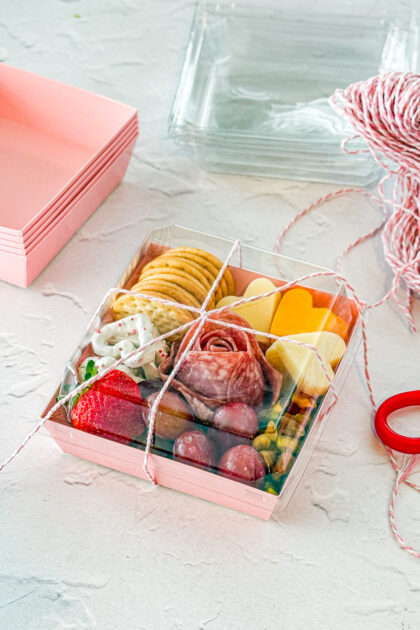
For the box, I purchased pink 5-inch disposable food boxes from Amazon. They are also available in white, black, and brown too. It’s $9.99 for a package of 20 boxes, and it also includes twine to tie the boxes with.
Creating a delightful charcuterie box involves incorporating a variety of elements to ensure a balanced and appetizing spread. Here are the key components to make a personal charcuterie box:
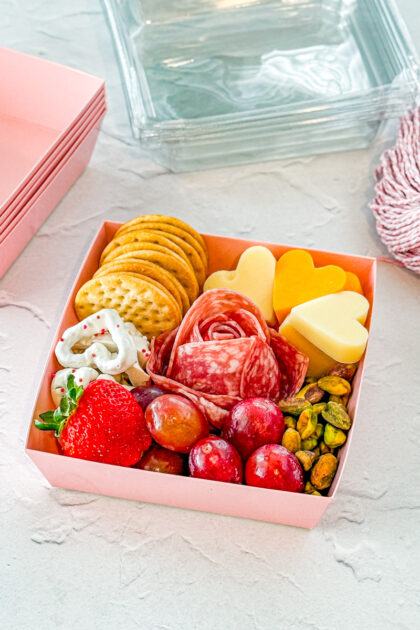
- Meat: Begin with a selection of cured meats such as salami or pepperoni. These are classic choices that add rich, savory flavors to your charcuterie box. To add a special touch, I shaped the slices into a rose. It’s easier than it looks, and I’ll provide instructions below on how to do this.
- Cheese: Include at least two types of cheese to offer variety. For my charcuterie box, I used thick slices of cheese. Then, I cut them into heart shapes using a small metal cookie cutter. This adds a fun touch, especially for a Valentine’s Day-themed box. If you prefer, you can also simply cut the cheese into cubes or slices.
- Crackers: Crackers are essential for pairing with meats and cheeses. With so many options available, choose one or two types you enjoy. Variety is key, so consider including both a plain and a flavored cracker to cater to different tastes. For this box, I used Cabaret crisp and buttery crackers.
- Fresh or Dried Fruit: Adding fruit introduces a sweet and juicy element to your charcuterie box. For my box, I included a fresh strawberry and some red grapes. Berries and grapes are always a good option. You can also experiment with dried fruits like apricots or figs for additional flavor and texture.
- Something Crunchy: Nuts are an excellent choice for adding a crunchy element to the box. I opted for shelled pistachios, which I purchased from the bulk section at my local Winco. This allows you to buy just the right amount and even mix different types of nuts if desired.
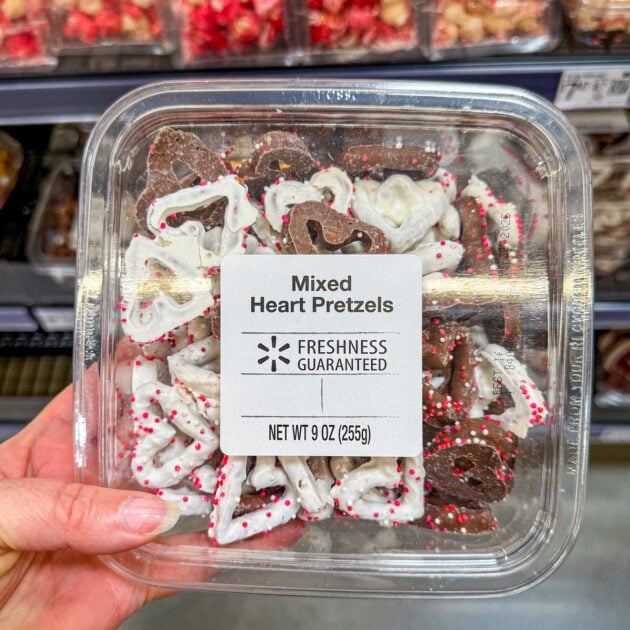
- Something Sweet: No charcuterie box is complete without a touch of sweetness. Wrapped chocolates are a popular option; I usually choose Dove chocolates or Ghirardelli squares. For a Valentine’s theme, I found heart-shaped pretzels covered in white chocolate and sprinkles in the bulk section at Winco. I’ve also sourced these from Walmart.
By incorporating these elements, you can create a visually appealing and delicious charcuterie box that is perfect for any occasion. Personalizing the box with themed shapes and a mix of textures and flavors ensures that each bite.
Creating a rose shape with pepperoni or salami for a personal charcuterie box is a fun and elegant way to elevate your charcuterie presentation. Here’s how you can do it:
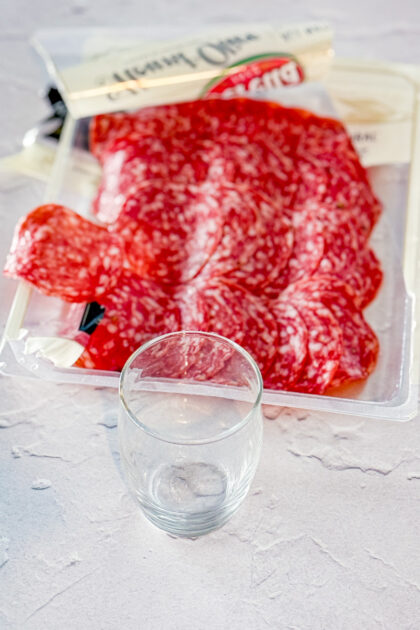
- Gather your ingredients and tools: You’ll need thin slices of pepperoni or salami and a small drinking glass or wine glass with a thin rim. You want a smaller rime for smaller roses. I used a small dessert glass. A shot glass is another good option.
For small roses, you want rounds of salami or pepperoni that are closer to 1 inch in diameter. I didn’t get slices that small when making these boxes. This made it hard to get the size I wanted for the box and get that perfect rose shape.
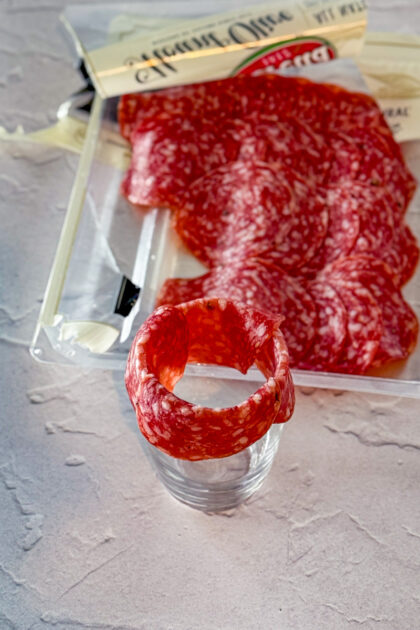
- Arrange the slices: Take one slice of pepperoni or salami and lay it over the rim of the glass. You want it so half of the slice is inside the glass and half outside. Repeat this process, overlapping each new slice slightly with the previous one. Do this until you’ve made a full circle around the rim of the glass.
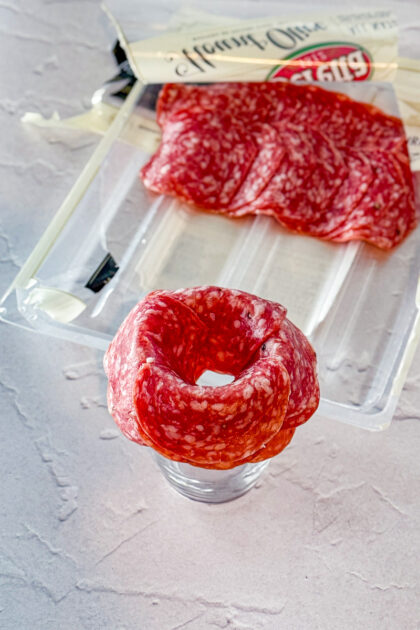
- Build up the layers: After completing the first layer, start a second layer by placing more slices slightly inside the first layer, continuing to overlap the slices. Repeat this process for about three to four layers, depending on how full you want your rose to be. beginning
- Shape the rose: Once you’ve added all your layers, carefully flip the glass over onto your charcuterie board or plate and gently lift the glass off. Your pepperoni or salami rose should hold its shape and look like a beautiful blooming flower.
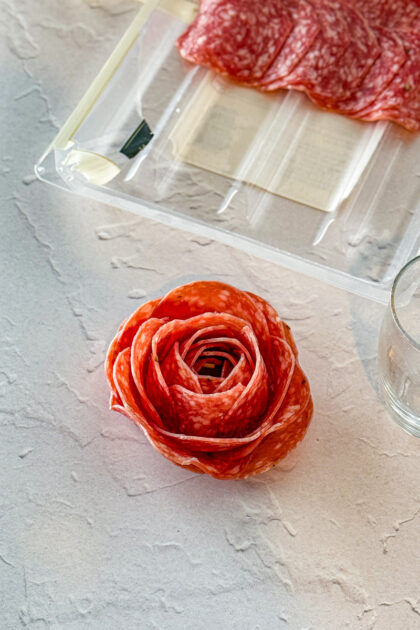
- Adjust if needed: If any slices have shifted during the process, you can gently adjust them to perfect the rose shape. This easy yet impressive technique will surely add a lovely visual element to your charcuterie box!
It is important to assemble the boxes just before delivering them to your recipient. Crackers and nuts can become soggy if they are in contact with moist ingredients like meats and fruits for an extended period. By assembling the boxes at the last moment, you ensure that each item retains its intended texture.
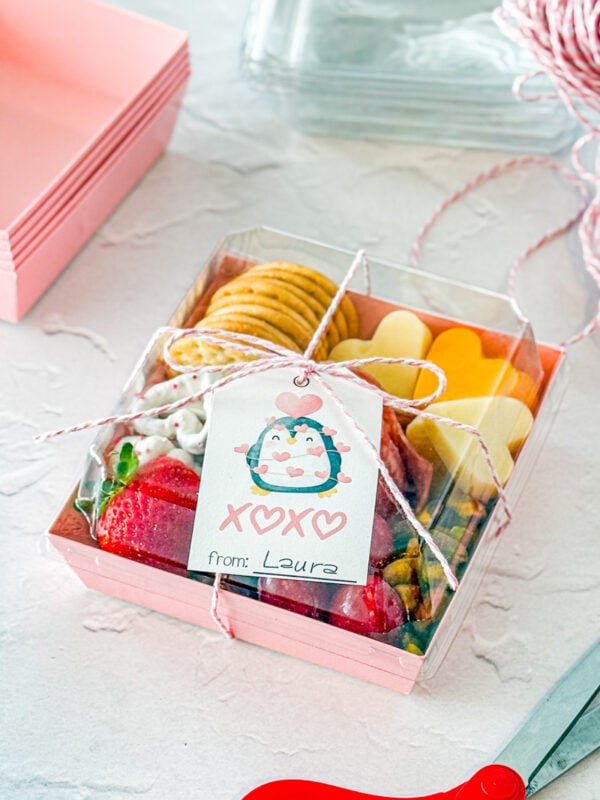
To add a finishing touch to your charcuterie boxes, use some twine. Neatly tie it around each box to secure them. This not only keeps everything in place but also adds a rustic, charming look. Next, don’t forget to include a fun and personalized gift tag. I found a wonderful selection of free printable tags over at Prudent Penny Pincher. The site offers a variety that complements the pink box beautifully.

However, you can explore other sources for more options, such as Pinterest, which is a treasure trove of creative and unique gift tag ideas. Personalizing your tags adds an extra layer of thoughtfulness and makes the gift even more special for the recipient. Be sure to check back this week. I will also be sharing how to make a personalized dessert charcuterie box.